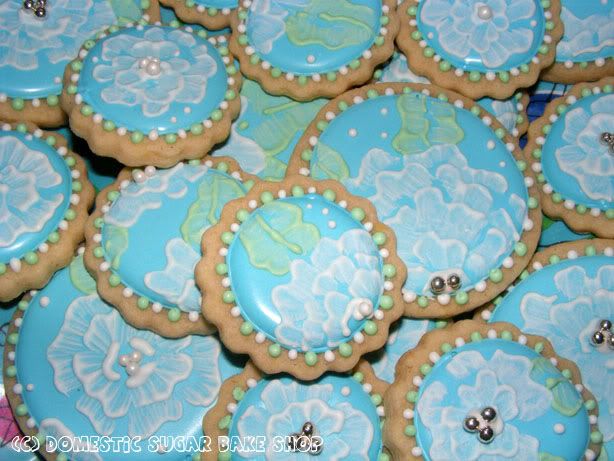
I am still a live, although some might have noticed a conspicuous absence (especially since I usually post at least twice a week on normal weeks). But, as I get deeper into the house thing, I am getting further from the kitchen. This week, I moved back into it to make these fabulous Brush Embroidery Flower cookies.
 This technique it super easy, and while some may have seen it, others may not have. I figured I would post a quick tutorial on brush embroidery and let you decide how you like it. This technique has also been used on my cakes (I used it on my Cheerleading Cake a while back).
So, all you really need is pre-baked cookies, royal icing (that's the kind that hardens), and a flat-sided paintbrush.
Okay, into the tutorial we go... you get to see more of my ugly picnic-indoor-eat-off-of-it table.
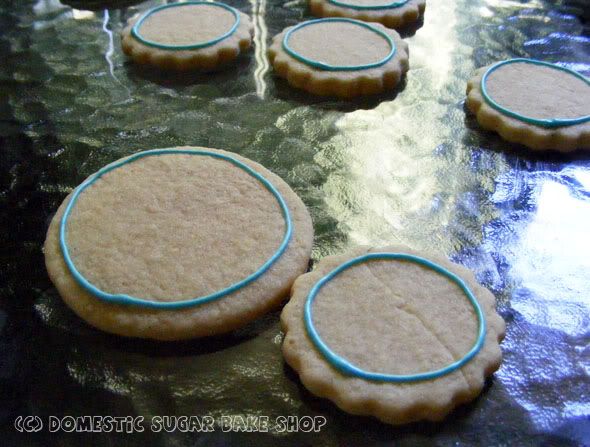
Step one. Using your royal icing in a piping bag, line the outside of the cookie... like this:
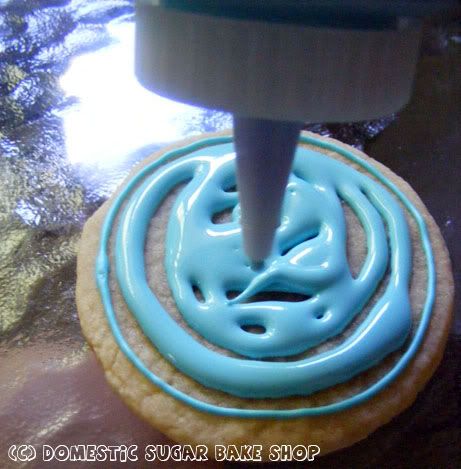
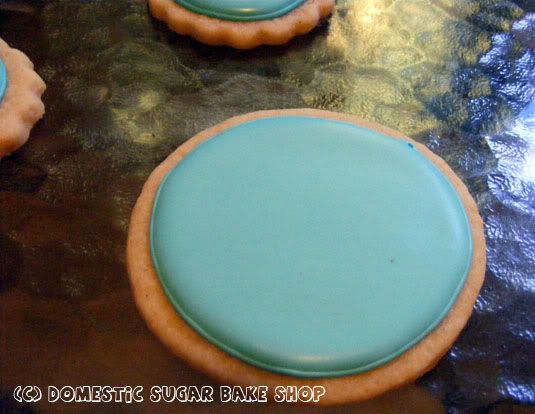
Let the outline dry for 10 minutes. Next, using a thinned royal icing called a 'flood', fill the circle so you will have a smooth cookie surface. I actually tap my cookies on the table to bring up air bubbles and pop them with a pin.
Once you have let that fill dry for at least 1 hour (depends on humidity etc), you can start painting. Mix a counter-color icing for the flower pattern... now we have fun!
 In a piping bag with a #1 or #2 tip Place begin piping the design on the flower. I used the broken petal method. Be careful not to have the icing too thin, if it is, it will be hard to get detail. I actually made my a little thin, but it came out nice all the same. It just needed more love ♥.
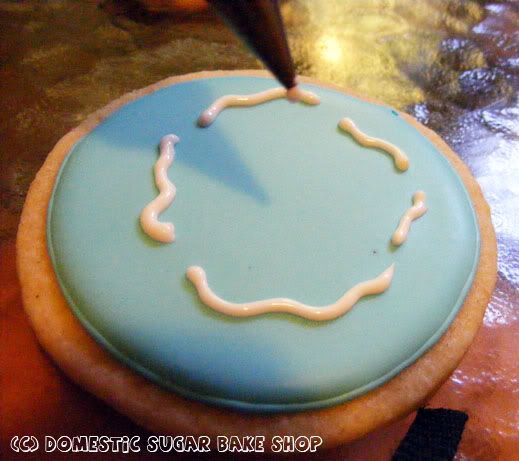 Now grab the brush and drag it downwards into the icing, moving towards the center of the cookie (or wherever you placed the flower. It does not necessarily need to be the center). I like to push up ever so slightly on the icing before brushing down, which gives it a little more ruffle int he petal, but it's your choice.
 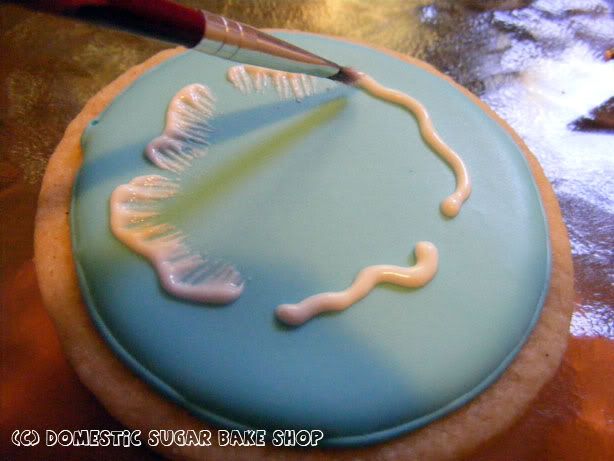 Continue to add petals moving into the center using the same technique.
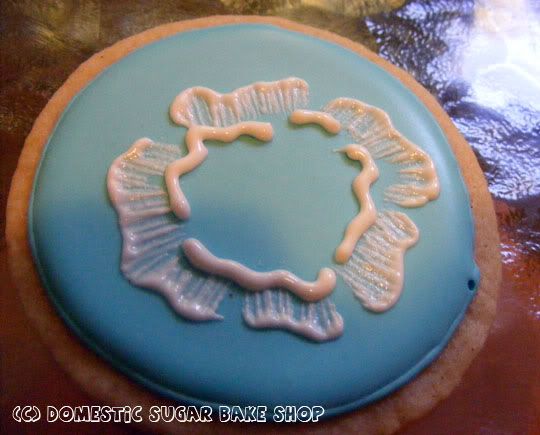
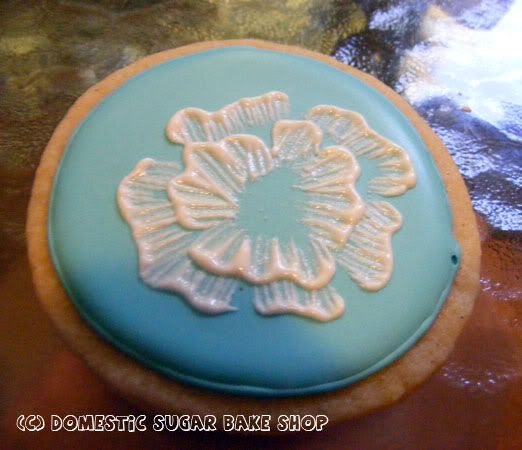
Keep going, then to finish, add lines (now you can see the thin-ness of the icing), and center it off with some kind of embellishment. I like using silver or white degrees, but there are other things you can use too.
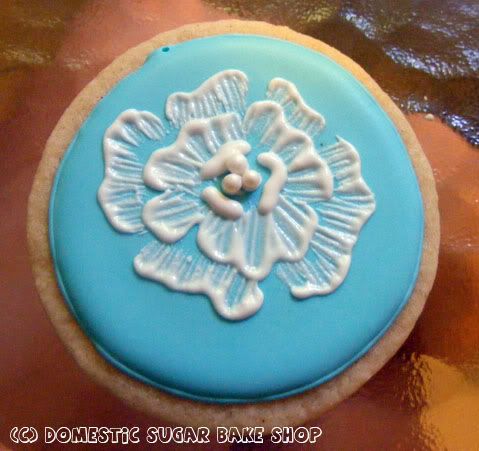

Like I said, you do not need to do a center flower each time. I like to add other flowers on the sides or off-center. I also thought it looked nice to add leaves to the sides of the flowers, a little green to contrast the blue and white.
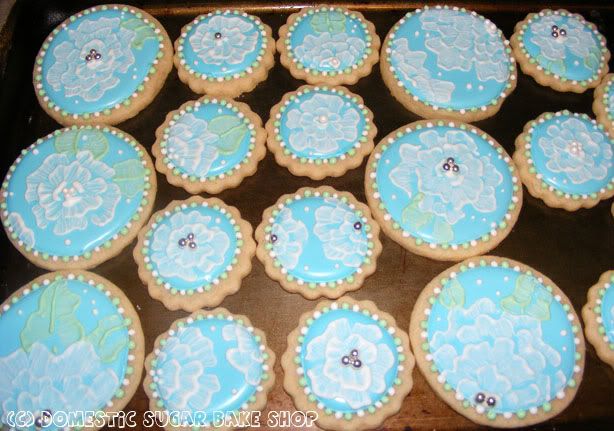 And that's how it's done. These cookies made their way to a lovely birthday party, though I got no photos. PHOOEY! I think I need a new camera... that way I have something to post good photos with, rather than these gloomy, grainy ones. You know you need a new camera when.
If you are feeling generous, and wish to send me one, please e-mail me :)
Until I get your e-mail, O mysteriously kind person, wherever you may be, I shall continue to post cookies and cakes.
Hope you are enjoying nice weather!
