New blog design. I can't wait for spring any longer! It's too close. This cute little theme has been in the back of my head for a while now. I've been wanting to create something a little more shiny and bright. What else is shiny? Well....
Who likes Cupcakes?
How about a giant cupcake?
Like This One:
Who likes Cupcakes?
How about a giant cupcake?
Like This One:
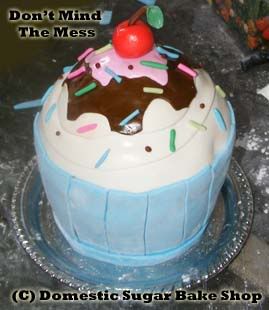
Well, I know I do! Would you like to learn how to make one? It is easier than you think. Carved cakes simply require a little bit of creativity... and a sharp knife!
What will you need:
Cakes (at least three 6-inch or five 9-inch cakes) I used a 6" pan, so three cakes here.
Icing (whatever type you like).
Marshmallow Fondant
Americolor Gel color
Gumpaste decorations
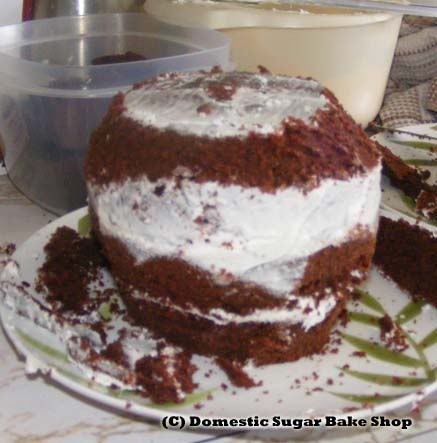
Step One:
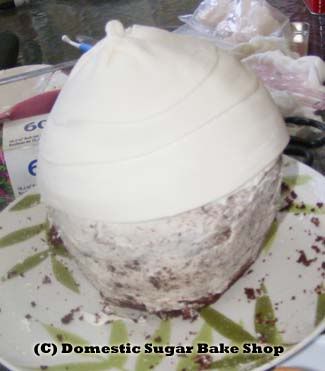
Stack your cakes and allow to settle. Once they have rested about 8 hours you can begin to cut them. I shaved the bottom inward and the top inward. You'll see the bulge in the middle making the cupcake shape. Be careful when cutting so as not to destroy the cake.
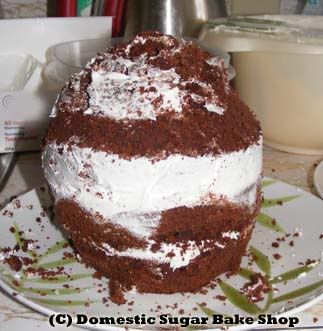
 Step 2:
Using the cake carvings (the leftovers from shaping) add some height onto the top of the cake.
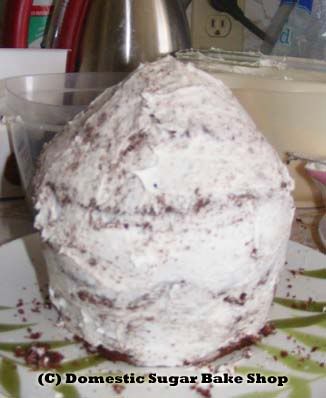
 Step 3:
Dirty-ice the cake. Allow time to crust.
 Step 4:
Once the cake has settled and the icing has crusted, apply another layer of icing. Now for the fondant. Using a flat band of fondant, wrap it around in a swirling pattern at the top of the cake. This will be the icing on the cupcake.
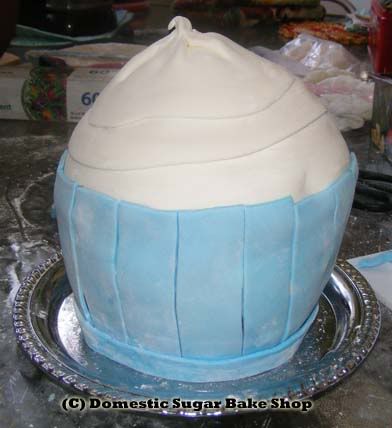
 Step 5:
Cut small strips of fondant (any color) to use as the wrapper. These rectangles give the cupcake a little more definition. Make sure to smooth the fondant with your smoothing tool.
 Step 6:
Cupcakes need toppings. I used a small bit of chocolate fondant, and a small bit of pink fondant to make a type of sauce for the top.
 Then, once that was placed on, I made jimmies and a cherry out of gum paste and let them dry.
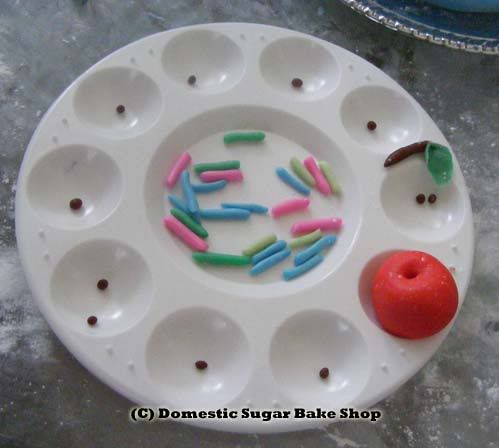
Apply each layer of with a little bit of water to hold down the item. This part is where you can get creative. It will depend on your own design. I like cherries. This looks like a delicious sundae!
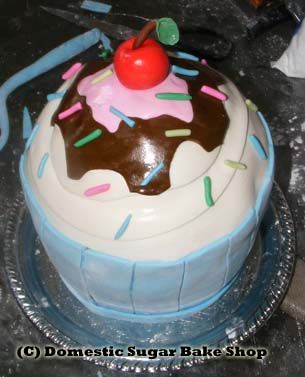 It's that simple!This cuppie is going to a friend of mine that gave up sugar. Maybe I can tempt her to the dark side >:)
Hope you enjoyed the tutorial!
